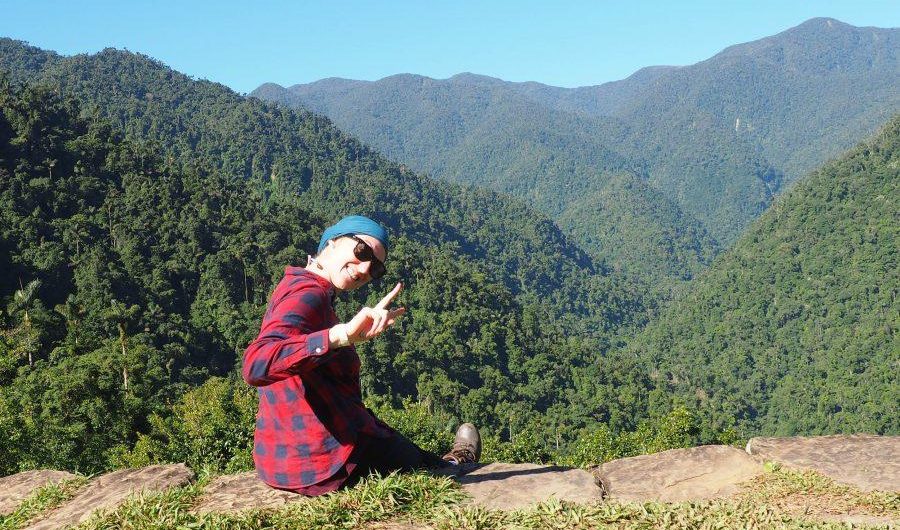
Guide to the Lost City Trek Colombia or Ciudad Perdida Tour, has been at the top of my ‘to do’ list since I arrived in Colombia. Despite reading a lot of different blogs and speaking to others I still felt unsure what to expect leading up to the trek. So, to help you be as prepared as you can for taking on this challenging hike here is my complete guide to The Lost City Trek.
The Colombia Lost City Trek
The Ciudad Perdida trek is a 46 km (28 miles) hike through the Sierra Nevada mountains. It is a jungle trek, so think hot and humid!
After day one you will be completely ‘off road’ and the only mode of transport other than your legs is a mule. The Ciudad Perdida hike takes you through the jungle to visit the abandoned city known locally as ‘Teyuna’.

It is believed that the city was founded in 800 CE (FYI that’s 650 years before Machu Picchu). The Lost City was ‘rediscovered’ in 1972 by a father and son who began to loot the site. After the ancient artifacts began to appear on the black market Colombian Archeologists found out about the site and began reconstruction, which was finished in 1982.
What is the food link on the Lost City Trek?
As a vegetarian food on tours is always a bit of an issue for me. When you are doing something this physical you need to be well fed to sustain your energy. I can honestly say that I was really, really well fed over the 3 days. In fact, I was so well fed I didn’t eat my snacks! I ended up giving away all my snacks as I didn’t want to carry them around anymore. We had a whole catering team who traveled with us.
They were total rockstars! The food was incredible and we were told right at the start that if we wanted more food all we had to do is ask.
Is the Lost City Trek in english or spanish?
This is a general thing in South America. If you don’t speak Spanish you need to make sure you communicate this to the tour operator.
Some operators will charge you extra for having the tour in English. Either because they will need to provide you with a translator or they will need a guide who speaks English, this is seen as an extra skill so the guide could be better paid. With Magic Tour Colombia, we had both a Spanish and English speaking guide at no extra cost.
If you need the tour in English make sure to request this when booking.
What To Pack For The Ciudad Perdida Tour
Rule number 1, only take what you absolutely need!
You are going to have to carry this stuff on your back for 4 days. This is what I would suggest taking with you.
- Small hiking backpack – make sure you have a waist strap (for comfort) and a place to keep your water for easy access.
- Quick-dry towel
- Hiking boots/ Hiking sandals/ sneakers with a good grip
- Flip flops
- 4 pairs of socks
- Hat
- 4 t-shirts to walk in (ideally these would be quick dry)
- 2-4 pairs of shorts/ long pants/ leggings
- Swimsuit
- Sunglasses
- Sun Care products
- Bug spray – super important!
- Soap
- Deodorant
- Toilet paper
- Mini first aid kit (Make sure you have ibuprofen and plasters)
What To Expect On The Ciudad Perdida Trek
In this section, I’m going to talk you through each day of the trek. To be clear this is my personal experience of it. Everyone experiences it differently depending on their fitness and preferences, I have tried to be as neutral as possible, but this was my experience of the Lost City trek with Magic Tour.
Day 1

Be sure to get a good night’s sleep and eat a decent breakfast! We were picked up at the hotel at 8:45 and taken to the magictour office. This is to sort out the paperwork, pay the final balance and listen to the pre-trip brief. We drove for approximately 2.5 hours to El Mamey.
We had lunch at Restaurant Edel Mira in El Mamey at 1 pm followed by a more detailed pre-hike talk from our guide Tomas. Using the map, he talked us through each day of the trek letting us know what to expect. Then we started the hike, from here you will have no phone service until you return after the hike.
On day one you have 3 hours of hiking. This was the worse day for me. The hike was brutal! It’s all uphill, you are at a low elevation so it’s still very hot, there is little shade and my bag was at its heaviest due to water. Plus it was a bit of a shock to my body after being sat in class for 4 weeks prior to this.
Day 2

Be warned you will have early starts every day! We were up at 5 am, breakfast at 5:30 and on the trail by 6 am. Expect a lot of uphill in the morning, but as you are shaded and it is early it’s pretty cool. We stopped at an indigenous village to learn more about it. This village is still in use but just for special occasions and celebrations.
After 3.5 hours of hiking, we then stopped for a swim and lunch. BEST. THING. EVER. after all of that walking. If you get lucky and it is sunny you can hang your clothes up to dry. We did get lucky and in an hour managed to dry everything off. This was the only time this happened during the trek! From here on expect to be wet!
The afternoon hike was tough (but not as tough as the day before). The views are spectacular during the pm so take your time and soak it all in. You will have to walk through a river so make sure you wear shorts on day 2! If you have hiking sandals now is a good time to wear them! Otherwise, you will need to take off your boots to cross the river.
On night 2 everyone for all of the tour groups stays together in Paradise Camp. Because of so many people, a lot of the groups slept in hammocks. Lucky for me Magic Tour made sure most of us had a bed. A few of the younger group members who volunteered to sleep in a hammock. There was a river to swim in here, but as you are at a higher altitude it is COLD. So I gave it a miss, the cold shower was enough for me!
Day 3

The big day! Be sure to get up early and get ready to leave at 6 am. You will be able to lock your bag up in a storeroom and all of the groups leave at a different time to avoid ‘congestion’ on the trail. The hike to Teyuna in the morning is pretty short compared to the other days. But it’s 1000+ steps up! Great workout for your butt though.
It actually wasn’t so bad. But save some energy for when you get there as the Lost City is built on the side of the mountain so you will keep climbing up if you want to get the iconic photo.
Once we had finished exploring the Lost City we continued on to see a traditional casa up close, where If you get lucky you will get to meet the Mamo (leader of the Kogi people living in the area).
Here we learned more about the indigenous people of the 4 tribes Kogi, Wiwa, Kankuamo, and Arhuaco. After passing many Kogis and Wiwas it was so interesting to learn more about them.
My ‘Little’ accident
On my way back not long after leaving the camp, I fell pretty badly and I managed to sprain my ankle and twist my knee. It was a bit of a shock and I’m not going to lie I was pretty worried! Mostly because I knew I had another 22km to go and my only option other than walking was to get a mule! Having had many injuries as a dancer I’m well acquainted with ankle sprains so I knew my best bet was to get straight up and keep walking.
So that’s what I did. I activated my yoga breathing and just kept going. It was hard, I was in a lot of pain but Tomas stayed with me checking in and making sure I was OK. When I got back to camp I cried! I think part relief I’d managed to do it and part pain! I was worried about it swelling and not being able to walk the next day so I went to bed early with a tone of arnica and ibuprofen!
Day 4
Because of my ‘little accident’, I was pretty nervous about today. Especially as I knew a lot of it was downhill (which was so much more painful than uphill). I’m pretty stubborn so I decided I was going to try and at least walk the first 3 hours back to camp 1 and after that, I would be able to get a Moto back. I did send my backpack on a mule for 20Mil though!
I was slow and careful and it wasn’t much fun. So I can’t really tell you much about day 4 as I spent most of it heavy breathing with my head down focusing on putting one foot in front of the other! When going uphill I felt nothing and dreaded going downhill. In some ways, I think my focus and breathing actually made it easier!
Anyway, after making it back to camp 1 I decided I had to finish this on foot or I would just be super disappointed in myself. So I just kept going! I may have been slow but I made it all the way back and felt so proud of myself. It wasn’t a terrible time either and I wasn’t the last in our group back surprisingly!
I got a round of applause from my group for making it, we all had a beer and another great meal before heading back to Santa Marta!

Final Thoughts
This hike was a huge challenge mentally and physically. But I LOVED it. Even with my injury. I’m also really glad I went with Magic Tour, once again they were incredible and I felt so well looked after by them. All of the groups have the same cost, they don’t all have this level of service though. If you are planning on doing the hike I highly recommend choosing them as your tour guides.
Author: Claires Itchy Feet. Visit his blog here


Comments